

Every homeowner who has lived through a major remodel has a story about something that had to be done twice. Maybe a freshly poured backyard patio had to be saw-cut six months later because nobody ran conduit for outdoor power, or newly painted interior walls ended up coated in concrete dust because basement foundation work happened after the drywall crew left. When you treat a whole-property overhaul as a collection of disconnected weekend projects, friction and wasted money are almost guaranteed.
Approaching a renovation with an engineering mindset changes everything. A residential property functions as a single, interconnected system where soil stability, water runoff, underground utilities, structural framing, mechanical equipment, and cosmetic finishes all depend on strict sequencing. When you work from the ground up, from the outside in, and from heavy infrastructure to delicate finishes, each trade sets the stage for the next instead of undoing previous work.
This six-phase master plan walks you through the exact sequence required to coordinate a comprehensive exterior and interior renovation. By following a logical order of operations, you can eliminate contractor bottlenecks, protect your home’s structural integrity, and build lasting value across every square foot of your lot.
Phase 1: Site Preparation, Staging, and Protecting Your Household

Before a single trench is dug or a wall is opened, you need to establish a clean, unobstructed, and safe job site. Rushing straight into demolition while furniture is still stacked in hallways and yard perimeters are overgrown creates daily delays that inflate labor bills.
Clear Living Zones and Establish Off-Site Storage Before Demolition Starts
Living inside an active construction zone sounds manageable on paper, yet drywall dust migrates through return vents, heavy boots scuff hardwood floors, and contractors lose hours each week shifting tarps and boxes out of their way. Clearing the workspace completely before the first day of demo protects your belongings and keeps crews moving at full speed.
- Audit and purge first: Sort every room slated for renovation at least three weeks before work begins, donating or selling items you will not bring back into the finished space.
- Hire professional help for heavy lifting: Booking a reliable moving service early allows you to relocate bulky furniture, major appliances, and fragile heirlooms into a climate-controlled storage unit or an isolated, sealed-off wing of the house.
- Protect remaining pathways: Lay heavy-duty rosin paper, ram board, and zippered plastic dust barriers between any occupied rooms and active work zones so fine particulates stay contained.
Establish a Safe Perimeter Around Overgrown Brush and Work Zones
Exterior site prep is just as critical as clearing interior rooms. Contractors routinely stage lumber, stone pallets, dumpsters, and scaffolding along yard edges and wooded borders, where tall grass, leaf litter, and dense brush create hidden hazards for both crews and family members.
- Cut back perimeter vegetation: Mow tall turf low, clear fallen branches, and remove old woodpiles along property boundaries where materials will be stored.
- Treat outdoor staging areas proactively: Scheduling a tick control service to treat wooded edges, brush lines, and perimeter turf before breaking ground reduces the risk of vector-borne illnesses while crews and homeowners haul materials back and forth across the yard.
- Designate clear drop zones: Mark out dedicated staging areas with stakes and high-visibility tape so delivery drivers know exactly where to unload pallets without blocking driveway access or crushing sprinkler heads.
Phase 2: Sub-Grade Engineering, Soil Stabilization, and Water Management
Water is the single greatest threat to residential structures. Every interior flooring upgrade, finished basement, and exterior hardscape depends on controlling gravity and groundwater first. Doing sub-grade site work early ensures heavy excavation equipment finishes its job while the yard is still rough.
Redirect Surface Runoff Away From Your Foundation Before Pouring Hardscapes
If your lot slopes toward your foundation or holds standing water after heavy storms, cosmetic upgrades will fail prematurely. Addressing water management while trenches are already open saves thousands of dollars compared to retrofitting pipes beneath finished walkways or patios.
- Establish positive surface grading: Re-grade soil around the entire perimeter of the home so the ground drops at least six inches over the first ten feet away from the foundation wall.
- Install sub-surface water routing: Incorporate commercial-grade drainage products such as perforated French drains wrapped in geotextile fabric, catch basins in low spots, and buried solid-wall downspout extensions that discharge water well away from structural footings.
- Include accessible cleanouts: Add surface cleanout ports at major pipe bends so you can flush out silt, roots, or debris with a garden hose during annual maintenance.
Stabilize Sloped Lots to Reclaim Usable Yard Space and Prevent Erosion
Steep or uneven yards suffer from soil washouts during spring rains and exert substantial lateral hydrostatic pressure against lower-level walls. Converting an unusable slope into level, functional zones requires proper structural engineering rather than decorative stacking.
- Build for lateral load and water relief: Construct an engineered retaining wall using interlocking masonry blocks, poured concrete, or heavy timber anchored below the frost line, backed by at least twelve inches of clean crushed stone and perforated drain tile.
- Reinforce taller grade changes: For walls exceeding three to four feet in height, incorporate layers of high-strength geogrid tied back into compacted soil lifts to prevent bowing or overturning over time.
- Verify municipal height limits: Check local building codes before digging, as most jurisdictions require structural engineering stamps and permits once a wall reaches a specific height threshold.
Phase 3: Heavy Exterior Access, Pads, and Driveway Infrastructure

Heavy vehicles—including ready-mix trucks, dump trucks, and boom lifts—can easily weigh 40,000 to 60,000 pounds. Scheduling structural concrete pours and driveway paving in the right order prevents freshly finished surfaces from cracking under construction traffic.
Sequence Structural Slabs, Footings, and Walkways in Coordinated Pours
Concrete work touches multiple parts of a whole-property remodel, from patio slabs and garage aprons to mechanical pads and sidewalk connections. Treating these pours as isolated events leads to extra delivery fees and inconsistent finishes.
- Consolidate your schedule: Group structural footings, backyard patios, and utility pads into coordinated pours so you avoid minimum-load surcharges from concrete deliveries and ensure consistent batch coloring across adjacent surfaces.
- Verify base compaction and reinforcement: Require a minimum four- to six-inch compacted crushed aggregate sub-base, steel rebar or wire mesh reinforcement, and properly spaced control joints every eight to twelve feet to manage natural shrinkage cracking.
- Plan for curing windows: Keep foot traffic off new slabs for at least 24 to 48 hours and restrict heavy vehicles for a full seven to ten days while the mix reaches structural design strength.
Resurface Driveways Only After Heavy Construction Traffic Finishes
One of the costliest mistakes homeowners make is repaving a worn-out driveway at the very start of a renovation. Roll-off dumpsters, lumber trucks, and excavators will quickly gouge, stain, or rut fresh pavement before the project is even halfway done.
- Hold off until heavy hauling wraps up: Collect estimates early to lock in seasonal scheduling, but book asphalt companies near the end of your exterior construction phase once dumpsters and heavy machinery have left the site.
- Inspect the aggregate base thoroughly: Insist on full-depth base compaction and proper crown or cross-slope grading so rainwater sheets cleanly off the driveway rather than pooling and softening the sub-base.
- Allow proper thermal curing: Avoid turning sharp steering wheels while stationary during the first hot summer weeks after installation, giving the binder time to oxidize and harden fully.
Phase 4: Basement Safety, Code Compliance, and Interior Plumbing Upgrades
With exterior grading, structural walls, and heavy site access under control, your renovation transitions cleanly into the building envelope. Below-grade spaces and core mechanical systems should be upgraded before framing, insulation, and drywall close up your walls.
Bring Below-Grade Bedrooms and Living Spaces Up to Modern Fire Code
Finishing a basement adds tremendous livable square footage, yet many older basements lack legal emergency exits and adequate natural light. Because adding below-grade openings requires exterior excavation and foundation cutting, this step bridges your exterior site work and interior framing.
- Meet International Residential Code dimensions: Any basement bedroom or primary living space generally requires an emergency escape opening with at least 5.7 square feet of net clear opening, a minimum 24-inch height, a minimum 20-inch width, and a sill height no more than 44 inches above the finished floor.
- Rely on specialized cutting crews: Hiring experienced egress window contractors ensures the foundation wall is cleanly saw-cut with structural headers installed properly, paired with a code-compliant corrugated steel or masonry well and permanent escape ladder.
- Tie window wells into perimeter drainage: Connect a vertical gravel drain pipe at the bottom of the window well directly into your home’s weeping tile system so heavy rain never backs up against the glass.
Protect New Pipes, Water Heaters, and Appliances From Hard-Water Scale
Installing high-efficiency tankless water heaters, thermostatic shower valves, and modern dishwashers without addressing water quality shortens their lifespan significantly. Mineral scale builds up rapidly inside narrow heat exchangers and ceramic cartridges.
- Treat water at the main entry point: Plumb a whole-house water softener system right after the main shutoff valve while basement walls and utility ceilings are open, sizing the resin tank capacity to your household’s daily gallon usage and local water hardness grain count.
- Build in serviceability: Include a three-valve bypass loop, an accessible brine tank location for easy salt refills, and a dedicated air-gap drain line routed to a floor drain or standpipe.
- Protect outdoor hose bibs: Branch your exterior irrigation and hose spigots off the unsoftened main line before the treatment unit so you avoid wasting softened water on lawns and gardens.
Phase 5: Outbuildings, Backyard Storage, and Property Organization
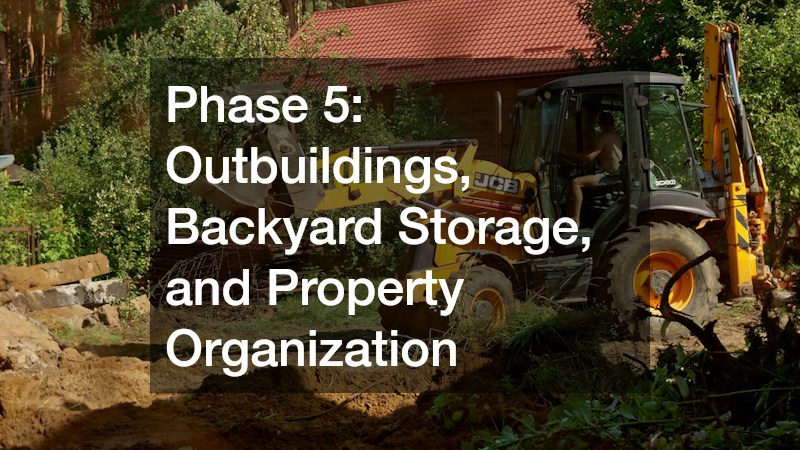
Once your main residence is weather-tight and mechanically sound, turn your attention to auxiliary structures. Moving lawn mowers, bicycles, seasonal decor, and workshop tools out of your attached garage frees up valuable space and elevates overall property organization.
Design Custom Outbuildings to Match Your Home’s Roofline and Siding
A thoughtfully designed backyard structure feels like an intentional architectural extension of your home rather than an afterthought dropped in the corner of the lawn.
- Choose builders who prioritize structural foundations: Work with reputable shed builders who set structures on laser-leveled crushed stone pads or concrete slabs, use pressure-treated floor framing, and match your main home’s roof pitch, shingle color, and trim details.
- Plan for ventilation and moisture control: Include ridge vents, gable louvers, and a vapor barrier beneath the floor system to prevent condensation, rust on tools, and mildew on stored fabrics.
- Verify setback and lot-coverage rules: Confirm property-line setback distances and maximum impervious surface ratios with your local zoning office before finalizing dimensions.
Run Conduit and Utility Rough-Ins Before Final Grading
Even if you only plan to use an outbuilding for basic storage today, running underground conduit before final landscaping saves tearing up fresh sod later. Call a lighting contractor for support.
- Oversize your underground PVC conduit: Trench a schedule-40 or schedule-80 PVC conduit line at code-compliant depth (typically 18 to 24 inches) from your main electrical panel to the outbuilding pad so you can pull power for lighting, outlets, or a future mini-split heat pump.
- Add a separate low-voltage sleeve: Lay a second parallel conduit pipe for fiber-optic or Ethernet cabling if there is any chance the structure will ever serve as a backyard office or studio.
- Photograph open trenches with a tape measure: Take clear photos showing exact trench locations and depths relative to permanent house corners before backfilling so future digging never strikes a buried line.
Phase 6: Exterior Illumination, Security, and Finishing Touches
The final phase brings your entire renovation together after dusk. Thoughtful exterior illumination highlights architectural textures, eliminates trip hazards along steps and walkways, and deters intruders around dark perimeters and outbuildings.
Layer Path, Accent, and Security Fixtures for Nighttime Safety and Curb Appeal
Effective exterior design relies on subtle, layered illumination rather than harsh, blinding floodlights that wash out your home’s facade and annoy neighbors.
Conduct a Whole-Property Walkthrough and Maintenance Handoff
Before signing off on final retainage payments, walk every square foot of your interior and exterior spaces with your project lead during daylight and again after sunset.
Bringing Your Master Plan Together

A successful whole-home renovation rarely comes down to luck or unlimited budgets—it comes down to discipline and sequence. When you clear and protect your site first, manage water and soil before pouring hardscapes, delay driveway paving until heavy trucks are gone, upgrade below-grade safety and plumbing before closing walls, and finish with custom storage and layered illumination, every dollar works harder for you.