

Taking on a complete whole-home renovation is an ambitious venture, but managing multiple trades, overlapping schedules, and complex material choices can rapidly feel overwhelming for any property owner. Achieving a successful property transformation depends on establishing a clear, logical order of operations–moving methodically from foundational utility updates to interior room finishes, before expanding outward toward exterior masonry, outdoor structures, and landscaping. When project phases follow a sensible hierarchy, homeowners safeguard their financial investment, avoid frustrating construction delays, and prevent trade teams from damaging freshly completed work. Whether modernizing a vintage residence or updating a suburban layout, relying on a comprehensive renovation checklist guarantees that every phase delivers long-term comfort, structural safety, and lasting visual appeal both inside the living space and throughout the surrounding yard. Proper scheduling protects a project budget and yields extraordinary results.
Phase 1: Establishing Mechanical Foundations and Heating Systems
Every successful whole-home overhaul starts behind the scenes within the main building envelope. Before picking out decorative paint colors or tearing down partition walls, property owners must evaluate essential plumbing lines, electrical panels, and primary heating infrastructure. Professional inspections carried out by licensed tradesmen uncover hidden pipe corrosion, outdated wiring, or inadequate ventilation early, ensuring the house can comfortably handle expanded modern fixtures without unexpected system failures down the road.
When modernizing domestic hot water delivery across multiple bathrooms, scheduling an initial tankless water heater service should be positioned early in the overall renovation timeline. Compact on-demand water units free up valuable floor space in utility closets while providing continuous hot water to high-demand households. Servicing or fitting this equipment during the initial rough-in phase ensures that gas supply lines, electrical connections, and exterior exhaust vents are properly installed long before drywall crews seal up the interior wall framing.
At the same time, central heating focal points inside primary living spaces require detailed technical evaluation. Structural chimneys and traditional masonry fireplaces must undergo complete flue inspections, masonry repairs, and safety checks prior to framing adjacent accent walls. Whether restoring a classic wood-burning hearth or converting to a convenient gas log setup, completing high-dust masonry and ventilation work early keeps soot, concrete dust, and heavy power tools away from fine interior surface materials added later in the project. Taking time for thorough preliminary checks reduces emergency service calls later.
Phase 2: Transforming Kitchens and Wet Spaces

Once the mechanical infrastructure passes local municipal building inspections, the renovation focus transitions toward high-use moisture areas. Kitchens and main bathrooms experience constant water exposure and heavy daily activity, making durable material selection and precise trade coordination critical. Successfully remodeling these high-impact rooms requires completing background waterproofing, cement backer boards, and custom cabinetry before permanent fixtures and heavy stone slabs arrive on site.
In master suites and family bathrooms, installing a frameless or semi-frameless shower enclosure requires exact subfloor leveling and thorough waterproofing membranes. Tile walls, cement backer boards, and floor drain assemblies must be fully set and cured before glass fabricators measure the opening for custom glass panels. Taking these extra precautions prevents moisture leaks from seeping into wall cavities, protecting adjacent bedrooms from structural wood rot while producing a sleek, low-maintenance bathing area.
Kitchen updates require similar attention to technical detail, particularly when integrating heavy natural stone or engineered quartz prep surfaces. Professional countertop services handle the precise digital templating, edge fabrication, and installation needed for flawless sink cutouts and cooktop openings. Choosing sinks, faucets, and slide-in ranges ahead of stone templating ensures that fabricators cut exact dimensions, avoiding risky jobsite modifications that could chip or crack expensive stone materials.
Phase 3: Selecting and Preparing Interior Flooring
With kitchen prep surfaces and bathroom wet zones secured, whole-home floor surface upgrades can safely commence. Flooring materials connect separate living areas into a unified visual design, but installing them requires a clean environment free from rough framing debris, heavy plumbing tools, and structural dust.
Achieving a durable, squeak-free floor installation relies heavily on thorough subfloor remediation. General contractors must check plywood subfloors for moisture content, drive screws into loose joists, and apply self-leveling underlayments before installing solid hardwood, engineered planks, or luxury vinyl tile. Taking the time to flatten subfloor depressions prevents finished planks from flexing, creaking, or separating under daily foot traffic across busy hallways and open living rooms.
For cozy bedrooms, upstairs nurseries, or quiet basement dens, visiting a well-stocked carpet store allows homeowners to test fiber densities, stain-resistant fabric treatments, and high-density padding options. Soft textile flooring provides superior acoustic insulation and cozy underfoot warmth, making it ideal for relaxing personal spaces. Scheduling carpet fitting near the tail end of interior trade work protects delicate carpet fibers from construction dirt, boot marks, and paint overspray.
Phase 4: Constructing Exterior Structures and Boundaries
As interior spaces near final trim stages, project attention shifts outward toward the surrounding lot. Building functional outdoor living zones extends usable square footage, creating comfortable areas for weekend entertaining and relaxed family gatherings. Exterior structural projects involve heavy digging, concrete footings, and lumber deliveries, making proper timing critical to keep equipment away from sensitive garden beds.
Hiring a licensed deck builder ensures that structural post footings, ledger board flashing, and support joists comply fully with regional building codes. Whether building with natural cedar, pressure-treated pine, or weather-resistant composite decking, a professionally designed outdoor deck serves as a durable transition zone between indoor kitchens and the back lawn. Skilled builders ensure appropriate deck slope and water management, preventing rain runoff from accumulating against the main house foundation.
To establish privacy, contain pets, and define clear property borders, scheduling a professional fencing installation is a natural next step. Perimeter fences shield patio spaces from neighboring eyes while adding security and architectural framing to the entire yard. Setting fence posts in deep, concrete-filled holes guarantees that wood panels, vinyl pickets, or ornamental metal sections remain upright and level despite strong winds and seasonal soil shifting.
Phase 5: Earthwork, Hardscaping, and Turf Preparation
With heavy deck frames and perimeter fencing secured, site attention turns to ground-level masonry and earth moving. Connecting distinct yard zones with stone walkways, retaining walls, and paver patios transforms open grass into structured outdoor rooms suitable for year-round enjoyment.
Partnering with a skilled hardscaping contractor allows homeowners to select heavy-duty pavers, natural flagstones, and engineered wall blocks built to survive local freezing and thawing cycles. Proper excavation, deep aggregate base compaction, and polymeric sand jointing prevent stone walkways from sinking or shifting over time. Integrating subtle drainage channels along stone patios directs heavy rainfall safely away from the home foundation and low-lying garden beds.
Following extensive heavy machinery operation across the yard, the surrounding soil frequently suffers from severe compaction and rutting. Contracting professional lawn care services helps rehabilitate damaged soil through mechanical core aeration, topsoil topdressing, and targeted overseeding or sod installation. Restoring soil health ensures that grass sprouts thick and green, framing new stone patios and wooden decks with vibrant, healthy turf.
Phase 6: Secondary Plumbing System Optimizations
As exterior masonry sets, interior finishing teams can return indoors to fine-tune specialized plumbing equipment and perform secondary system checks. Revisiting high-use water fixtures ensures that every valve, drain, and supply line functions smoothly before family members move back into renovated spaces.
Checking each glass shower enclosure for flawless door alignment, tight magnetic sweeps, and fresh silicone seals guarantees long-term performance. Technicians inspect hinges and handle hardware, applying high-grade mold-resistant sealant along bottom tracks to keep water contained strictly within the shower basin. Taking time for these fine adjustments prevents hidden moisture damage under bathroom tile floors.
Plumbing specialists should also recheck the main hot water source after initial home testing. Performing a follow-up tankless water heater service allows technicians to flush out any stray pipe scale, fine-tune fuel-to-air combustion ratios, and check digital thermostats. This quick maintenance visit ensures consistent hot water delivery and optimal energy efficiency across every newly installed bathroom and kitchen fixture.
Phase 7: Refinement of Living Room Accents and Counter Surfaces
Returning to the main living and entertainment rooms, attention centers on refining focal design elements and protective treatments. Central gathering areas require careful finishing details to ensure that decorative surfaces remain beautiful and resilient against daily household activity.
Inspecting masonry or prefabricated fireplaces during this secondary finishing stage guarantees that hearth extensions, tile surrounds, and wooden mantels fit tightly against adjacent trim work and drywall. Technicians confirm proper gas log alignment or flue damper operation, ensuring safe combustion before cool weather arrives. A well-finished hearth serves as a cozy visual center, adding warmth and elegance to open-plan living rooms.
Similarly, kitchen islands and wet bar counters benefit from final polish visits by professional countertop services. Specialists apply commercial-grade stone sealers to granite and marble surfaces, buff out minor surface scuffs, and verify that silicone joints along tile backsplashes remain fully watertight. Sealing porous natural stone guards against permanent stains caused by coffee spills, cooking oils, and acidic citrus juices during daily meal preparation.
Phase 8: Integrating Decking Elements with Masonry Patios
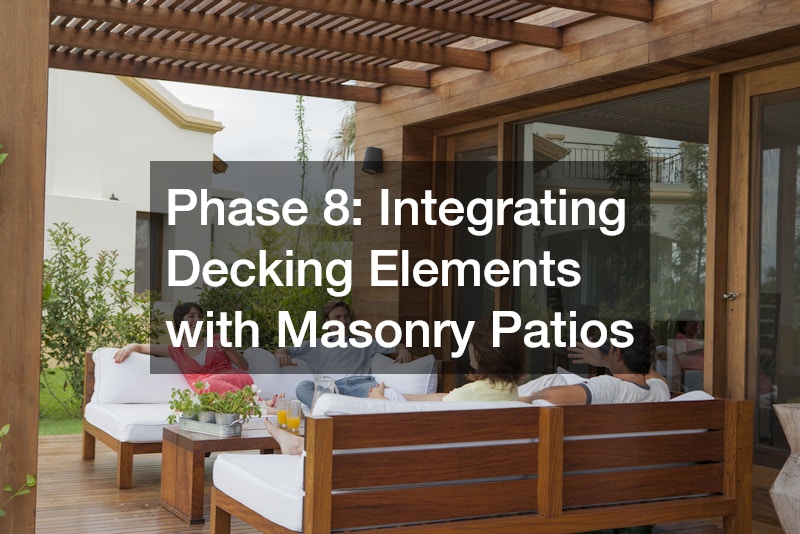
With interior living spaces fully detailed, outdoor construction crews return to smoothly connect elevated deck structures with ground-level stone patios. Unifying elevated timber features with ground-level stonework creates an inviting, multi-tiered outdoor environment.
A qualified deck builder can return to install matching staircases, custom timber handrails, or integrated low-voltage LED lighting beneath step treads. Designing wide, comfortable stair transitions allows guests to move effortlessly between upper dining decks and lower patio zones. Integrated step lights enhance night safety while highlighting the rich textures of surrounding wood and composite materials.
Concurrently, a hardscaping contractor can construct custom stone landing pads, built-in masonry seating walls, or fire pit surrounds that mirror the patio materials below. Tying elevated wooden decks directly into heavy stone features produces a cohesive architectural layout, making the back yard feel like an intentional, high-end resort expansion.
Phase 9: Site Boundary Inspection and Lawn Care Management
The final phase of exterior property renovation focuses on border security, structural protection, and establishing long-term turf maintenance routines. Fine-tuning outdoor boundaries ensures that the entire property looks pristine while offering maximum security.
Conducting a final fencing installation review ensures that entry gates swing freely, latches engage securely, and posts show no signs of movement. Applying a high-quality protective stain or water-repellent sealant to wooden fence boards guards against rain absorption, wood rot, and sun damage. Protecting border timber early preserves the natural wood grain and extends the structural lifespan of the boundary fence.
To maintain lush curb appeal surrounding new outdoor structures, arranging an ongoing maintenance program with professional lawn care services is essential. Scheduled fertilizing, seasonal weed control, and controlled mowing schedules encourage deep root growth across newly established grass. Healthy, well-manicured lawns soften the hard lines of stone pavers and wooden fences, creating a vibrant landscape frame for the completed home.
Phase 10: Final Floor Inspections and Interior Textile Care
The ultimate step in a whole-home renovation involves final quality checks, deep surface cleaning, and establishing proper care routines for all interior flooring investments. Ensuring that every surface is pristine leaves the home ready for comfortable daily living.
A thorough walk-through across every completed floor installation confirms that transition strips, stair nosings, and baseboard shoe moldings fit tightly against floorboards. Contractors verify that expansion gaps around wood floors are properly covered, preventing dust accumulation while allowing natural wood movement during changing seasonal humidity levels.
Finally, visiting or consulting with a local carpet store provides guidance on selecting appropriate vacuum cleaner models, specialized spot cleaners, and protective entrance mats. Placing durable entry rugs at exterior doors traps dirt and moisture before it reaches interior carpets or hardwood planking. Proper rug selection and regular maintenance preserve pile plushness, keeping newly installed carpeted rooms fresh and comfortable for years to come.
Executing a comprehensive whole-home renovation requires patience, strategic planning, and skilled craftsmanship across every stage. By following a clear, structured checklist–from foundational mechanical upgrades and luxury interior finishes to structural outdoor additions and lush landscaping–property owners create a harmonious environment that enhances daily living and long-term property value. Balancing interior comfort with functional outdoor spaces results in a home that serves every family’s needs with style, efficiency, and lasting quality for decades to come.